
More loft room plaster boarding and plastering
By Andy the stuff doer
I had previously managed to plaster board most of the attic walls and ceilings but it needed a few more sheets to finish the rooms so I could plaster it all. I didn’t show the new wall in the previous post so to start with is the new stud wall separating the twin room from the landing area. Previously you had to walk through one room to get to the other. With much head scratching we eventually worked out how to fit in two single beds and have floor space to make the room cosy but comfortable. Pinching inches wherever we could meant the studs where only two inches deep making the wall 3 inches in total with the plaster board.

sound insulation fitted in thin attic stud wall
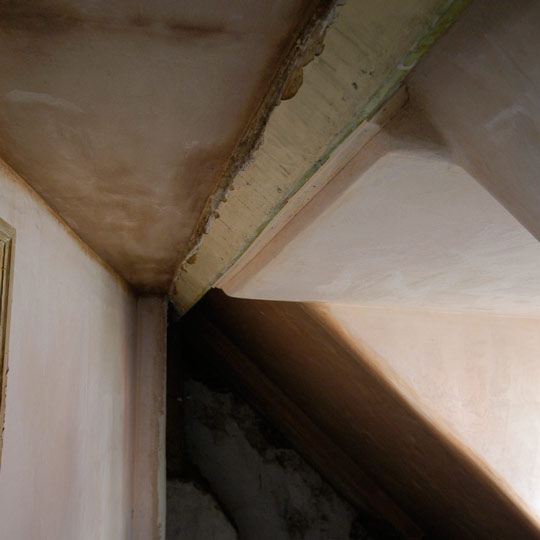
To give the stud wall a bit more sound insulation the cavity is filled with rockwool, seen here held in place with some tape before the plaster board is fitted. Then on to the landing area you should just be able to see here the round dowel or brush handle at the corner of the dormer window. This is to form a rounded corner. As it’s quite low, rounded corners make it a bit softer on any heads that might come in to contact with it. It also matches the corners on the remaining lime plaster work at the side of the staircase.

Landing area plaster board with round timber bead to form rounded corner
Following the plaster boarding is to the skrim tape all the joints between the boards, all the corners and where they fit to the existing walls. Unfortunately it looks like I’ve lost a set of photos so I’ll skip to some photos of the finished plastering. First some easy bits, flat sections between purlins gave me chance to hone my plastering skills, I was a bit rusty. Then on to the horizontal ceiling parts and finally to the tricky rounded corners and details.

Attic rooms plastered
The corners to the dormer ended up looking great once I had worked out how to trowel an even curve.

Plastering a rounded corner
And some more details around the window where adding the insulation made it an awkward area.
Plaster detail around purlin and insulation keeping the corners “soft”
Prior to Plastering I had fitted the skirting boards (which reminds me I’ve not shown how I mould these with the angled quirk) and the recycled architrave around the doors. Here’s a little detail on the skirting board that gives a little extra space at the head of the stairs, it looks a bit fancy as well.
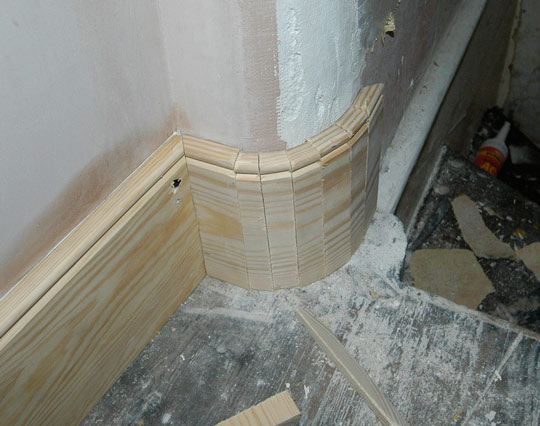
Curved skirting board corner made up from small sections
It’ll just need a bit of filling and sanding to make a neat looking smooth rounded corner. With all that done the two attic rooms and landing are well on the way to being finished. Although the final details will take up many hours.
This is very simple yet helpful. Thanks for sharing.