Filling under the cruck frame in the bathroom

By Andy the stuff doer

Under this beam the  brick wall had bowed away and left  a 150mm void where the wall should have been. This bit a wall is also single skin an external so it would be cold spot encouraging condensation.  After making sure it was al stable the void is filled with the leftover insulation from the attic roof and well sealed for a good moisture barrier.

Insulation under the beam in the bathroom

Insulation under the beam in the bathroom

The vertical timber props up the old beam on to the new floor beam and column. It’s then finished off with plywood.

Boarded under the beam with plywood.

Boarded under the beam with plywood.

Sound Insulating Wall

By Andy the stuff doer

Wherever I can in the Whitby cottage I’m upgrading to provide better thermal and sound insulation.  One area in particular was highlighted by the other half.  This was the wall between the bedroom on the first floor and the bathroom. When we bought cottage the wall was just hardboard pinned on to some old and unrepairable patched up 3/4 inch timber panelling.  Every wash, flush, gargle and “movement” would wake anyone in the bedroom.   The old wall had to be taken down (with any reuseable bits being incorporated elsewhere).  The first part of the reconstruction was on the bedroom side. This was plasterboard on  2 x 2 inch timber stud work and a few recycled bits of wood. All very conventional apart from the the plaster board being bonded to timber with an acoustic sealent/adhesive as well as drywall screws.

As this is the only completely rebuilt dividing wall I made full use of the oppertunity to route the central heating pipe work, ventilation ducting and various wiring circuits.

plaster board wall on timber stud work

Fist layer of the sound insulating wall with the ventilation ducting fitted

A double layer of plaster board adds to mass of the wall but as with other areas in cottage we need to keep the maximum amout of living space. So to replicate a double layer I glued plasterboard to the inside, between the studs before building a totally seperate set of stud work. Space being an issue again on the bathroom side of the wall made for some unconventional stud work to fit around the ventilation ducting

timber studs around ducting

Separate timber stud work fitted around the ventilation ducting to minimise overall wall thickness

The void is then filled with glass wool to deaden the airspace before it’s plaster boarded over.

sound insulating with rockwool

Rockwool between two skins of plasterboard for sound insulation.


plaster boarded and skimmed wall

Plaster boarded and skimmed wall

Nearly finished kitchen

By Andy the stuff doer

Last few major bits to finish the kitchen

Lime plastered wall

Last bit of wall lime plastered.

It was so long ago now that we first uncovered the mystery door

Window ledge and L shaped bit of worktop fitted

Window ledge and L shaped bit of worktop fitted

Pipework done

Pipework done as the final fit, including gas for the cooker to the regs.

Using soft sand and NHL lime to paint exposed stone as the start of replicating stone that has been limewashed many times of hundreds of years.

Using soft sand and NHL lime to paint exposed stone as the start of replicating stone that has been lime washed many times over hundreds of years.

tight fit with the cooker

All the new appliances including the cooker could be disassembled to a point where we could fit them down the passage and through the doors.

So apart from the final fit of the electrics, appliances and few other bits and bobs, painting,…  the kitchen is done.

Bespoke / handmade kitchen

By Andy the stuff doer

As usual I’m way behind on writing up what has been done at the cottage so I’m not even going try and keep things in chronological order. I’ll just get the pictures up and brief explanation, starting with the kitchen cupboards.

Ref the post on small kitchen design.

No way I could fit standard kitchen cupboards.  Here’s the bespoke hand-built kitchen from scratch:

Timber frame kitchen cupboards to fit the walls and floor

Timber frame to fit the walls and floor

hand made kitchen

Sides in plywood and backs only where needed to maximise space

Cupboard to cover the electricary

Cupboard to cover the electricary

kitchen Drawers, doors and open shelves made

Drawers, doors and open shelves made

Simple kitchen cupboard door construction with solid timber t&g

Simple door construction with solid timber t&g

kitchen draws simple construction

Drawers with a lapped joint on the front, pinned and glued, butt joints screwed and glued at the back, plywood base in routered groove. Simple but effective.

anti friction tape draw runner

Tip for easy sliding draw runners. Instead of waxing the the draw runners use anti friction tape for a smooth glide.

Beach work surface added

Beech work surface added

Cost in materials – next to nothing, cost in time – ages.  But it’s spot on and made a small kitchen extremely practical.

Quick and cheap wood steamer

Quick and cheap steamer to bend …..

steamed wood bending

…. a strip of the worktop beech… 15mm thick and it will bend quite a bit to make…

worktop up-stand curved

… a curved bit of up-stand for the worktop.

With all that made and finished the rest of kitchen can be done.

Relaying and Finishing recycled Floorboards

By Andy the stuff doer

An end to the bathroom floor saga.
It’s been great to finally finish this part of renovation. For earlier parts of the story have a look here  where I had to support and level the floor, the lengths I had to go to do this “in keeping with” , repairing the old boards.  And then their was planning and fitting all the electrics and plumbing to go under the floor and as I hope to never have to lift this floor it all needed testing first so that meant waiting until the boiler was fitted.  With all that behind me I could nearly go ahead and fit the recycled boards.

First final, final checks on the wiring and plumbing then to put some insulation. The bathroom is over a passage way so it need thermal and sound insulating.  I choose a combination of rockwool typ stuff and vermiculite. A thin layer of rockwool as a first layer justin case the ceiling of the passageway ever gets damaged would hold up the loose fill vermiculite. The vermiculite is better sound insulation than rockwool hence the combination. I then added another thin layer on rock wool as a final layer to fill the rest of the void.

rockwool and vermiculite sound and heat insulation.

Insulation between joists under the bathroom floor

The recycled and repaired boards I nailed down using the traditional cut brads. To make sure of tight fit between the boards I clamped them up using a couple of car jacks this turned out to be a fine way doing the job without having to resort to specialist cramps or wedges.

car jack being used to push recycled floor boards together

Recycled floor board fitting
car jack used to close the joints

With the floor boards refitted it was time to think how to finish them in a suitable way for a bathroom because having gone to all this trouble it would be a shame not to have a real wood floor. The boards where slightly uneven at the joints (the old tongue and grooves not being accurate) and the repairs needed flattening and had suffered from previous abuse and a little wood worm damage in parts.

Floor boards repaired and relayed

pine floor boards repaired where damaged

The floor needed sanding back to an acceptable state unfortunately this meant removing most of the patina of age although I took it back by the bare minimum so it still had some dents and knocks showing.

floor boards nailed down and sanded

Old recycled bathroom floorboards laid and sanded

After consultation with the other half it was decided to dye or stain the pine dark before varnishing or waxing or lacquering. After much research and head scratching I came up with what I hope will be the right methods and materials to use. I found the information supplied by Toby Newell of floorsanding-UK.com very useful.  I might not have produced aresult as good as he could but it looks good to me and the other half likes it. I’ll be posting more of the detail on the website when I get chance ****

In brief , the first thing was to decide the actual colour so I did a few samples on an off cut. Then did all the filling using a resin and sanding dust ( a revelation for me and technique I’m also using on the cruck frame).  Followed by finished it off with a clear satin finish two part water based laquer.

recycled floorboards dyed and lacquerd

Bathroom floor finished with water based lacquer

The character of the wood shines through whilst the finish should be practical and long lasting. With that done I can get on with sorting the rest of bathroom out.

Plinth for the raditor (as seen above), Skirting boards, resting the wood panelled wall to right, repairing the lime plaster to right, fitting radiator, lime plastering the window wall, bending a flush pipe for to toilet, polishing the roll top bath, a spot of decorating then  fitting the toilet sink bath and shower leaving just the finishing touches to sort out. So nearly done!

Kitchen tiling in the Whitby Cottage

By Andy the stuff doer

With a current emphasis on getting the kitchen sorted it was time to sort out some tiling. Another little milestone as it’s a final finish but as such it needed to spot on and fully authorised by the the other half.
A trip to the a DIY shed sorted the choice of tiles without too much trouble the only slight hesitation where ceramic floor tile that are textured and coulours to look like stone. Real stone would have been nice but the practicality for long term maintance, cleaning nunged us towards ceramic tiles. So we ended up these large rectangular tiles to be laid in a ” brick pattern. A relatively simple job to fit in a square room with a flat floor. Of course the kitchen in cottage isn’t square or flat and I didn’t want to raise the floor level any further by using a self levelling screed. Instead I ground chiseled the high spots back enough so I could vary the depth enough to end up with a flat floor. With smaller tiles it would have been possible to follower the floor to some extent but the large tile in this pattern would have meant noticeable steps at the joints.

large kitchen floor tiles

Floor tiles on an uneven floor

The wall tiling for the cooker and sink splash-backs are also laid in the “brick” pattern so that also proved to take longer than normal on the wobbly walls. I could have plastered the brick wall but again I’m trying to squeeze as much space as possible so I tiled directly on the brick. Careful chipping away of any protruding bricks gave me flat result. The s tone around the sink did need plastering to give me anything like flat and square to work with.

Tiling straight and flat on a brick wall

Cooker and sink splashback tiling

Space saving in a kitchen at this level involves doing things differently from what you normally see. Taps for belfast sink are normally mounted on a bit worktop behind the sink, this is standard modern modular kitchens force you to do things. With our sink right oup to wall the taps had to be wall mounted. So before I could complete the tiling the taps had to chosen, bought and fitted.

Wall mounted kitchen sink taps  tiled

Wall mounted kitchen taps over belfast sink. Making the most of available space

As with everything on this project all the tiling was fiddly and time consuming, but it’s the results that count. On that count I’m well chuffed and compared to bespoke kitchen cabinets and walls cupboard it all just a drop in ocean of time that this restoration is taking.

Hiding wiring and plumbing in the walls

By Andy the stuff doer

We didn’t want an excess of wires and pipes all over the place so my forward thinking and planning I’ve managed to get most of it out of sight.  This hasn’t been easy as I’ve wanted to preserve as much as possible of the old walls and woodwork, every little hole and channel has been carefully considered.  One area that did give me some extra scope was in the kitchen where underneath a layer of plaster board we found some matchboarding.  This had been applied to back of the Georgian panelled dividing wall at some point in the last century (or a bit earlier?).  We could have taken it off to leave the back of the Georgian panelling exposed as it had been some time in the past judging by the paint and later wall paper to give us an extra 1.5 inch in the kitchen. However  this would have meant destroying this bit of evidence from the past and meant all the wiring and plumbing would have to be separately boxed in.   The choice was made to use this small cavity and restore the matchboard.

Sockets and switch wiring in wall

Hidding the wiring and pipes in the wall, hopefully everything I’l ever need is in there.

Hot and cold  supplies plus central heating pipework, enough sockets for a modern kitchen, extractor switches, switches, lighting, themostat, hydrostat all in.

Hiding the wires and pipes in the wall

Another section of the wall where pipes and wiring have been fitted

In the other conner the 15mm central heating splits down to 10mm for tw0 radiators downstairs and one up, the lighting circuits feed in to hall way and up stairs and I’ve even got TV aerial cables in there. This section also gave access so I could stabilise bits of the Georgian panelling from behind.

repaired matchboard walls

matchboard wall panneling repaired clearly showing where shelves used to be

Using reclaimed bits of matchboard the wall is but back together with only one new piece that stands a bit proud right in the corner wear space was too tight to fit the pipework without cutting out parts of the framework holding the Georgian panels.

Repaired matchboard wall painted

Repaired matchboard wall painted

With a first coat of primer I can see it’ll be wipe-able like it needs to be in small kitchen but still with plenty of the old character showing through.  Its been a while since a did this and the central heating has been working and drying out the timber, it goes to show how much damp we had. The gaps between the matchboards have opened up and will need re-corking hopefully it’ll have stabilised now.


Belfast sink with drainer – Small kitchen design

By Andy the stuff doer

The kitchen in the cottage is small, there’s nothing much we can do about that because the walls that divide it off from the rest of the downstairs have definite historical value. The only things would could do is first to take the various layers (including plaster board, tiling, asbestos sheet) that added inches to some of the walls. Secondly to do some careful planning for a bespoke units and fittings to maximise the available space.

When it comes to kitchens I’m not in charge, the other half has to give the OK to all the details. This makes for a lengthy process including lots of sketches, layouts, etc. for me to explain whats possible and to work out the practicalities.  The idea of going to kitchen company for them to workout some plans wasn’t really an option.

Kitchen sink before

Old sink ( just in the bottom left) fitted on a kitchen unit taking up lots of space.

With the other half wanting a 900mm cooker and a tall ladder fridge freezer we had to find a bit more space from somewhere.  After much head scratching it came down to shifting the sink.  The picture above shown how the sink, fitted on a 500mm base unit sits in front of the window recess. I we could fit the sink in to recess then everything would be possible. This was about the only compromise I’ve had to make regarding maintaining the old structures, it would mean taking a couple of stones out of the wall.

After another session of sketches we rejected the idea of a modern ceramic sink and drainer, a belfast sink with a wooden drainer, a belfast sink with a separate ceramic drainer. The perfect solution is a belfast sink and drainer combined, initially priced up at about £150.  Problem being that was an ebay starting price, when we actual came to look for one we discovered how rare they are second hand and how expensive (£800 ish) they are new.  So it was a while before we found what we needed at the right price, in the right condition and within travelling distance.  I wouldn’t advise shifting one of these on your own but needs must and I eventually got it to the cottage so I could start fitting it.

Stones removed to fit a sink in to the recces

Stones removed to fit a sink in to the recces

With the rest of everything stripped away from the wall I could see what needed doing and took out the required stones and then stabilised it all  (hydraulic lime mortar again).

Of course nothing is ever simiple with a job like this, the plumbing for taps had to go somewhere and  I thought ahead for routing various electrics.

Electrics and plumbing behind sink

Plumbing and electric concealed behind the sink

During these stages the kitchen was out of action for a few weeks so I was definitely on my own for while.  It was worth all the work though as shifting the sink, and having wall mounted taps means we’ve gained a crucial 5 square feet of floor space.

Belfast sink with drainer

Belfast sink with drainer fitted into the stone wall under the window.

With bespoke, hand made units the kitchen will have a comfortable amount of work space, plenty of storage space, the big cooker, full sized dishwasher and the large fridge freezer.  All this will be covered later , but for now we’ve got running water in the cottage once again.

Work experience with the Stuff Doer

By Andy the stuff doer

Hello my name is Samuel,
I’m currently doing working with my dad, Andy, for my work experience. This article is about what I’ve learnt whilst working at his firm AGB MSS (Photography and Marketing for other firms).

Before I even started my work experience I learnt how annoying it is to set these things up. After my initial assignment at an engineering firm was cancelled, I was forced to take up a non-preferable work placement. My dad however did not want this so he went out of his way to get me a placement with him. Even though he works from home most of time he had to get a risk assessment then take out employee insurance. After that I was all set to get to work.

Student-work-experience-home-office

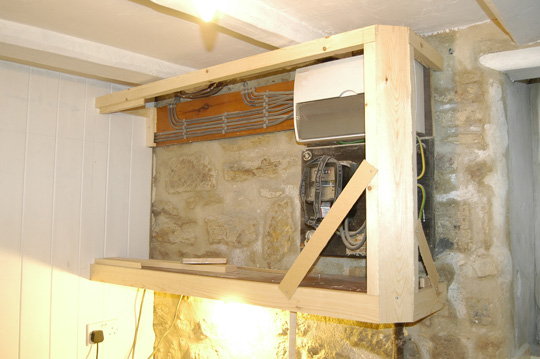
Working on computer in a home office for my work experience

24th March-
The very first thing I learnt was that I do not want to be an accountant, after seeing how hard and confusing it is to sort out taxes and what is what I think I will avoid that job like the plague. I did learn other things like what an Invoice is as well as how the taxation system works to a deeper extent, learning about this was aided greatly by using spreadsheets. This has shown me the need for business people to understand their accounts and taxes in order to keep running profitably.
My dad also gave me a insight into the current situation with West Bromwich mortgage company breaking there BOE tracker mortgage contracts by later setting it up as a variable rate by increasing the margin they charge above the base rate. He has assisted with the campaign organised by the Property 118 website to take them to court.

After all of this we later came up with a innovative design for a plane table (a peace of surveying equipment) for the woods as we needed to make a accurate map.
We had to work with some specifications:
-Must me mechanical
-Must be quick to use
-Must evaluate hight
-Must need no extra measurements bedsides what’s on the table

25th March-
My recent task was to help reply to the Youtube subscribers for the IdoStuff Youtube account were my dad post videos about his recent projects.

I also just learn’t how to edit the blog, the first couple of paragraphs were written on word and transferred over. The links to relative websites were added just a few minutes ago well now they were probably added days ago from when your reading this. Right now I have put images up from the previous day and today to and interest through illustrations and I promoted the blog post through social media.

I have also recorded the stock we have, this way I can see what stock we need to order so that we can get the supply before we need them. Checking stock is mostly looking a how much ink and paper we have as we burn through them the most.

On the side project of the plane table:
-Figured out and finalised how hight will be predicted and measured without using trigonometry
-The simplest way of collecting scaled distance with out leaving the table or using calculations.
-Found out I want it to be brass in order to look like something Victorian.

26th March-
Today my primary focus was mostly orientated around Trelawny floor planer, I had to help my dad create a illustration of the floor planer using Adobe Illustrator. This was rather simple compared to the latter task of editing the web page.

I had to figure out how to resize images using photoshop so they would not need to be resized in the webpage, this helps to improve the speed of the webpage loading. It was quite interesting how webpages get formatted through Dreamweaver. Constantly renaming images to optimise the search engine’s ability to find it became quite tedious after 20 minutes.

On the topic for the Plane Table:
-Rough scale designs have been drawn
-Loosing the argument to make it out of brass
-Getting confused with the maths again

27th March-
Today we hatched plans to expand the photography part of the business by adding thermography to the mix. Thermography is like photography but instead of using visible light for images it uses infra-red radiation, in other words it shows a image using heat. Doing this will allow people to pay for a service in which a house or  building is scanned to show were heat is escaping. This allows them to decrease there heating bills.

I have also assisted in the development of a advertisement for a training course through EBAY. This is composed of background images and text that browsers will recognise so that when people search for certain phrases the advert is more than likely to show up. This helps publicity and sales.

On the topic of the mechanical plane table:
-Considering prototype
-Designing table base

28th March-
This was my final day of work experience and I had less to do today than normal but these jobs were very important. First job check all the emails and alert dad of anything important, there was nothing to relay. The second job tidy the office this was extremely tedious all the stationary and stock. the other jobs were to do with the Plane table project.

1- Check if the idea is patented
didn’t want to get too serious if we cant use it
2- Go over rough sketches
we needed to make sure that the design was perfect
3- Use adobe Illustrator
This gave a neat and tidy design


Repairing, reinforcing crack in corner of walls

By Andy the stuff doer

This was, hopefully, nearly the very last bit a structural reinforcement required.  The front stone wall, even though it is 2 foot thick has bulged slightly outwards over time. A gap / crack had opened up between the outer wall between the window reveal and opening to passage way and the single skin brick wall of the passageway.   This section of the outer wall between the the window and passage way is a column just 1 foot wide and as you can see it’s not in the best of condition with missing mud mortar and brick being added on so it’s no surprise the deflection had occurred.

I wasn’t too concerned about the crack as I could tell it had been filled a number of times over , quite possibly, a few hundred years. However the cement render on the passageway side had cracked indicating it was still moving during the last 50 years. So it did need some attention more than just deep pointing up the stone and refilling especially as there is nothing tying the walls together.

stone wall crack in corner

Crack and gap between stone and brick walls reinforced with steel bars

The bricks where just butted up to the wall, and the stone wall had some wide gaps in it where the mud mortar had disappeared.  The solution for brick structures with reasonable mortar would be to helical stainless steel reinforcement, on “off the shelf” solution.  In this situation I could fit cheap, heavy duty galvanised steel straps.

The top one could be screwed to the timber beam and the bottom one screed to a lateral timber built in to the wall.  The middle two are set in mortar joints.

Steel bar wall reinforcement

Galvanised steel bar inserted in to stonework and screwed to beam

The more interesting ends are where they go in to the stone wall.

steel bar stone wall crack repair

Steel bar for reinforcement with screws as pins to resist pull out.

The steel bar come pre drilled with many convenient holes. To resist the bar pulling out of the stone wall I put stainless steel srcews through that would pin the bar in when the cavities are re-mortared. As they are a loose fit and can jiggle about they do allow the bars to be positioned just in the right place without having to adjust and chip away at the holes they fit in.

With the bars fitted the holes, cavities and joints in stone wall where packed with grit sand and NHL mortar with extra pinnings (stone chips) where required.   This may have stopped any future movement in it’s self but the belt and braces approach ensures the best chance completely curing the cracking corner problem.  And if that isn’t enough the crack its self was filled and reinforced with mesh.

mesh reinforcement in corner of walls

crack in corner repaired with extra reinforcement with mesh

I fished it off be pointing the brickwork and rendering the stone with a soft sand mix. The stone wall rendering is done to follow the contour of wall as once painted it should be a fairly close match to the wall at the other side of the window.